I have a huge stash of yarn in my basement. I don't know where it came from, maybe it crawled in one day when I was inattentive and left the cellar door open, I've had that happen with snakes and toads and maybe that's what happened with the yarn.
However it happened, I have skeins and skeins of yarn! The colors are not very attractive and the texture of most of it is questionable. Why some company produced yarn that feels like kitchen scrubbing pads is beyond me but it's there in my basement, lying in wait for me every time I go down there.
It usually looks accusingly at me, as if to say, "Why do you hate me and never let me see the light of day?" I've tried to ignore it, but it's getting harder and harder. I feel bad for the poor stuff, even though it's ugly and scratchy and no one in a million years would want to wear anything made from it.
And I was successful in ignoring it until a couple of months ago. That was when I came up with the brilliant idea to try and design a shrug pattern. Most of the shrug patterns I've seen are simply rectangles of knitting with parts stitched up for the arms. Is that the route I took when designing my pattern? Oh no, not me! I had to have one with fluted cuffs and different stitches to give it texture and a nice big ruffle around the neck line!
So down to the basement, where the yarn is kept contained in plastic tubs. I did that so the yarn doesn't get out and try to strangle me when I go down to do laundry and so far it's worked! Anyway, I pulled the tubs down and cautiously opened them.
All the yarn started clamoring for my attention. "Pick me,pick me!" they all shouted.
After doing battle with some of the more unruly skeins, I headed upstairs with my choices. I picked a florescent orange, don't ask why, I don't know, maybe it yelled louder than all the rest, a variegated yarn with the appealing name of Chili, a raspberry colored yarn and a large skein of Christmas red. Then I started knitting. I won't bore you with the details but it took me quite a while to finish this piece and I did so in the middle of July so I can't even wear my creation for months, but oh well, I will get to wear it eventually.
And now, what you've all been waiting for (if you've had the courage and stamina to read this far), here is my shrug in all its glory!
Note the bright orange ruffle that encircles the whole thing. I wanted it to mimic the cuffs with a knit 4, purl 4 ribbing but I ran out of room on my circular needles because I had about a gajillion stitches on the needle but I was too cheap to go out and buy a larger set.
Showing posts with label knitting. Show all posts
Saturday, July 11, 2015
Thursday, October 16, 2014
Countdown to Christmas 2014
Julie and Blu from Blue Morning Expressions are again hosting the famous Countdown to Christmas on their blog. I missed the first three weeks but finally got my act together and participated in week 4. I encourage anyone who can, to visit and participate.
All that's required is that you have a shop somewhere on line. You can post three of your items but you Must promote all the items in the countdown, either through twitter, face book, pinterest, and/or wanelo or your blog. Pinterset and Wanelo are recommended because everything is displayed in one place.
It's a fun way to get to see what other artists are doing and to help each other out.
Countdown to Christmas Week 1
Countdown to Christmas Week 2
Countdown to Christmas Week3
Countdown to Christmas 2014 Week 4
Countdown to Christmas Week 5
Countdown to Christmas 2014 Week 6
Countdown to Christmas Week 7
Here's Countdown to Christmas Week 8
Blue Morning Expressions Countdown to Christmas Week 9
Countdown to Christmas 2014 Week 10
Countdown To Christmas 2014 Week 11
Countdown to Christmas 2014 Week 12
All that's required is that you have a shop somewhere on line. You can post three of your items but you Must promote all the items in the countdown, either through twitter, face book, pinterest, and/or wanelo or your blog. Pinterset and Wanelo are recommended because everything is displayed in one place.
It's a fun way to get to see what other artists are doing and to help each other out.
Countdown to Christmas Week 1
Countdown to Christmas Week 2
Countdown to Christmas Week3
Countdown to Christmas 2014 Week 4
Countdown to Christmas Week 5
Countdown to Christmas 2014 Week 6
Countdown to Christmas Week 7
Here's Countdown to Christmas Week 8
Blue Morning Expressions Countdown to Christmas Week 9
Countdown to Christmas 2014 Week 10
Countdown To Christmas 2014 Week 11
Countdown to Christmas 2014 Week 12
Thursday, October 2, 2014
The Color Black
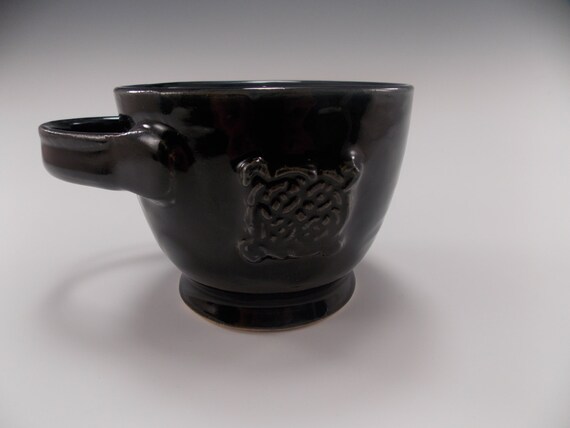
The color black is a fashion essential from the little black dress to a touch of jet or ebony at your ears or wrist. Black seems to set other colors off, giving them a pop that they would not possess on their own. Here are a few items from around the web that I found and loved. Hope you love them, as well.
Snowman Earrings by Shadow Dog Designs
Focal Bead by Blue Morning Expressions

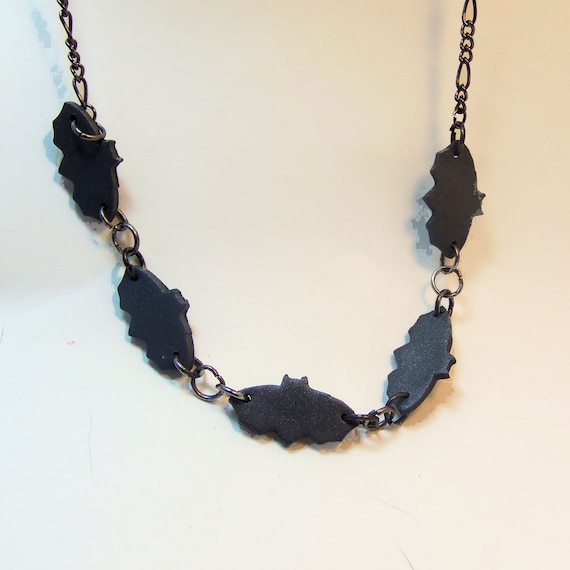
Black Bat Necklace by Fantasy Clay Store

Labels:
baby,
bat,
beanie,
Black,
brooch Wyvern Designs,
drinking,
earrings,
fingerless gloves,
Halloween,
jewelry,
knitting,
mug,
pendant,
pin,
pottery,
quilting,
shaving
Saturday, July 12, 2014
The Colors of Purple
Purple is one of my favorite colors, from the deepest royal to the palest lilacs.
Purple was one of the first colors used in prehistoric times, as early as 16,000 and 25,000 BCE. As early as the 15th century BCE citizens of ancient Phoenicia were producing a purple dye from a gland of the sea snail called the spiny dye-murex. . Since the process to produce this color was long and laborious and as a consequence expensive, purple became the color of kings and those wealthy enough to afford it.
It wasn't until 1856, when a British chemistry student, William Henry Perkins produced the first synthetic aniline dye while trying to synthesize quinine. His dye was called mauveine after the mallow flower, which was later shortened to mauve.
Soon Perkins built a factory and started producing the dye by the ton. As a consequence, purple was no longer exclusive to the wealthy/
Maybe I was a royal in a past life and so came to my love of purple naturally. I don't know but I do love purple. I've found some wonderful purple items to demonstrate just how beautiful this color is.
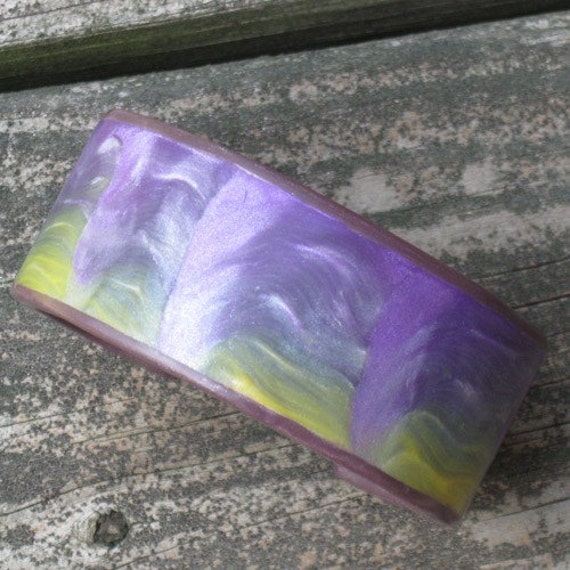
This bracelet by Valerie's Stuff evokes the feeling of s sunset with its purple and yellow swirls.
Abstract Modern Purple Polymer Clay Bracelet by Valerie's Stuff
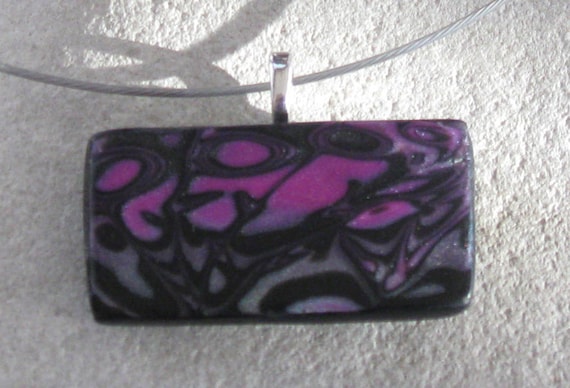
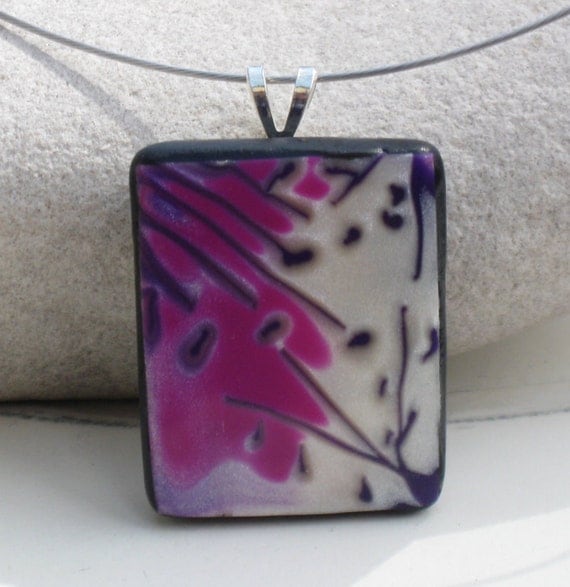
While this piece is an abstract, I see flowers in a garden. I guess that's the objective of an abstract, though, to make you see something that's only suggested by the color and form.
Modern Abstract Polymer Clay Pendant by Valerie's Stuff
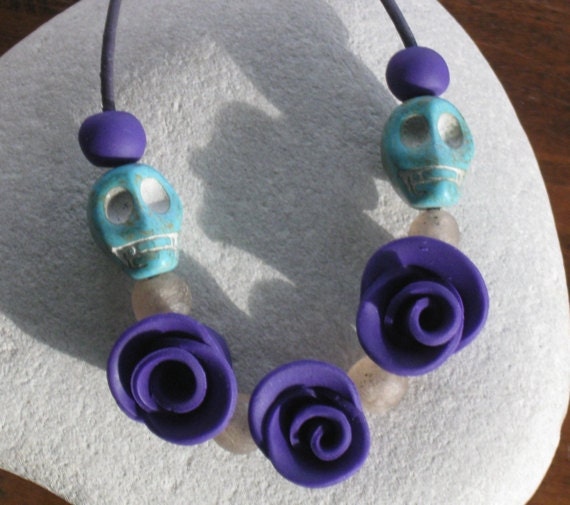
This necklace makes me feel the juxtaposition of life, the roses and death, the skulls.
Purple Roses and Turquoise Sugar Skull Polymer Clay Necklace by Valeries Stuff
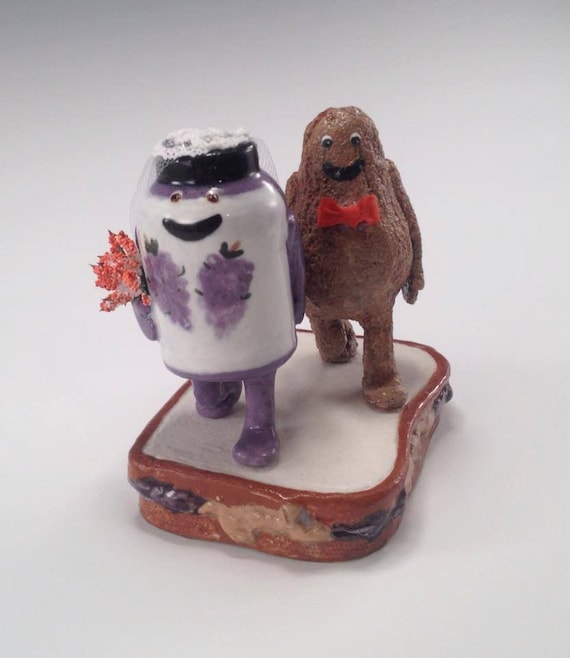
Peanut Butter aand Jelly Custom Figurine/Cake Topper by Pottery Heaven
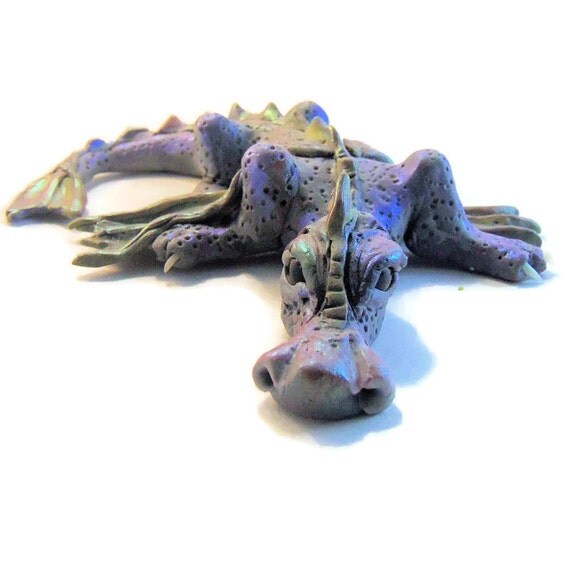
I love dragons and this reclining dragon remind me of the way my dog always lays.
Winged Purple and Green Dragon by Fantasy Clay Store
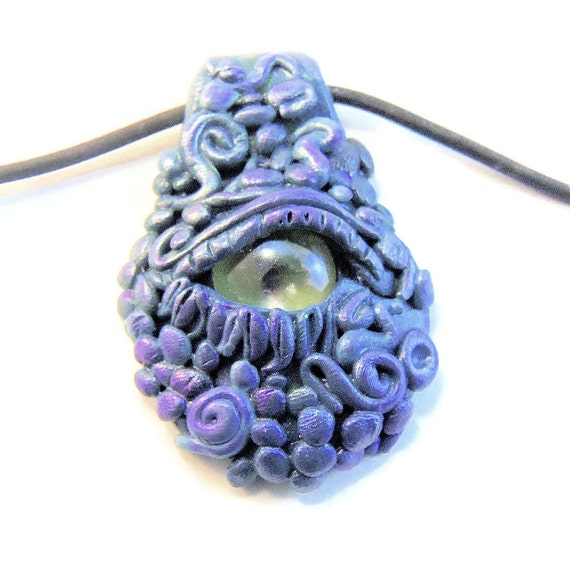
If you wear this, you will always have a dragon looking out for you!
Polymer Clay Dragon's Eye Pendant Fantasy Clay Store
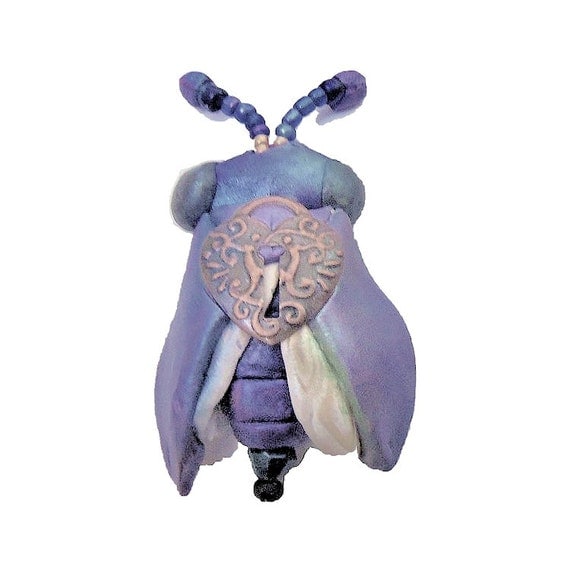
Steampunk evokes so many feelings in so many people. Some hate it, some love it. This cute little steampunk bug is so adorable, you can't help but love it!
Polymer Clay Steampunk Shimmery Bug Brooch Fantasy Clay Store
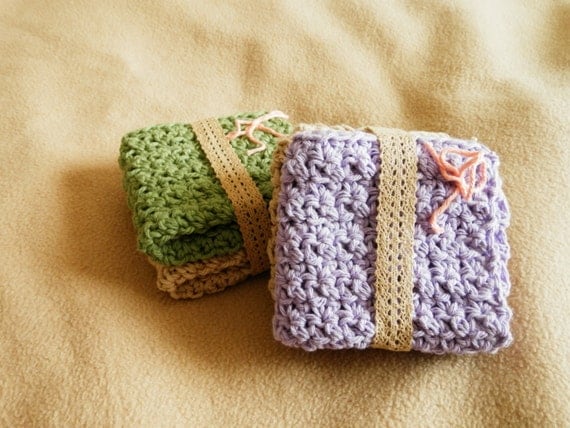
Hand made wash cloths are the best and here's a set of 4 that has my favorite color!
Dainty Wash Cloths Set of 4 by TL Yarn Crafts
Purple was one of the first colors used in prehistoric times, as early as 16,000 and 25,000 BCE. As early as the 15th century BCE citizens of ancient Phoenicia were producing a purple dye from a gland of the sea snail called the spiny dye-murex. . Since the process to produce this color was long and laborious and as a consequence expensive, purple became the color of kings and those wealthy enough to afford it.
It wasn't until 1856, when a British chemistry student, William Henry Perkins produced the first synthetic aniline dye while trying to synthesize quinine. His dye was called mauveine after the mallow flower, which was later shortened to mauve.
Soon Perkins built a factory and started producing the dye by the ton. As a consequence, purple was no longer exclusive to the wealthy/
Maybe I was a royal in a past life and so came to my love of purple naturally. I don't know but I do love purple. I've found some wonderful purple items to demonstrate just how beautiful this color is.
This bracelet by Valerie's Stuff evokes the feeling of s sunset with its purple and yellow swirls.
Abstract Modern Purple Polymer Clay Bracelet by Valerie's Stuff
While this piece is an abstract, I see flowers in a garden. I guess that's the objective of an abstract, though, to make you see something that's only suggested by the color and form.
Modern Abstract Polymer Clay Pendant by Valerie's Stuff
This necklace makes me feel the juxtaposition of life, the roses and death, the skulls.
Purple Roses and Turquoise Sugar Skull Polymer Clay Necklace by Valeries Stuff
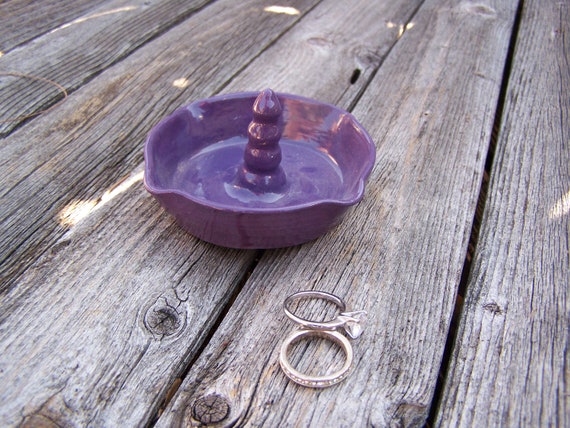
I don't usually wear rings unless I'm going out somewhere but this ring holder would look perfect by anyone's sink.
I chose this because it made me smile:)Peanut Butter aand Jelly Custom Figurine/Cake Topper by Pottery Heaven
I love dragons and this reclining dragon remind me of the way my dog always lays.
Winged Purple and Green Dragon by Fantasy Clay Store
If you wear this, you will always have a dragon looking out for you!
Polymer Clay Dragon's Eye Pendant Fantasy Clay Store

Polymer Clay Steampunk Shimmery Bug Brooch Fantasy Clay Store
Hand made wash cloths are the best and here's a set of 4 that has my favorite color!
Dainty Wash Cloths Set of 4 by TL Yarn Crafts
Wednesday, July 2, 2014
Knitting In The Round
Since I haven't learned any new techniques lately, I decided to rehash my adventures in learning to knit gloves, mittens and hats using two circular needles. I have already written a post about this but I love doing it so much that I decided to do anther one.
I first came across this method of knitting from a craft book club to which I belong. I was looking through the book catalog before throwing it in the recycling bucket and a book called Knitting Circles Around Mittens and More by Antje Gillingham caught my eye.
I've knitted for years, having learned from my mother as a child, but my projects were mostly flat items, afghans, scarves and the like. The few times I attempted to knit mittens, they always came out way too big and were always different lengths and they had to be seamed up the side, since I could never get the hang of knitting with double pointed needles. The same was true for any hats I made. With this technique, the mittens or gloves come out the same length and size, since you work them both at the same time.
Knitting with two circular needles takes some getting used to. The book said to get two different length circular needles so that you can keep track of which needle you started on but I found that knitting with one 16" needle and one 24" needle didn't feel comfortable. I solved that problem by using two of the longer needles and placing a stitch marker at the beginning of the starting needle.
In this method you cast on your stitches onto one of the needles and split them between the two needles, making sure that the stitches don't get twisted in the process. I can't tell you how many times I had to start over because I hadn't realized that I had somehow gotten the stitches twisted. Once you have done this process for both mittens on the same two needles, you start to knit. At first this method can be quite confusing, at least I found it so. You have two needles, two balls of yarn, and two dangling bits from casting on your stitches. I had to start over a number of times because I either started knitting with the wrong ball of yarn or with the left over from casting on. As I stated in my first post about this method, it was like knitting with an uncooperative octopus and there were lots of expletives uttered and many times I got so frustrated that I threw the whole thing against the nearest wall.
But I am quite stubborn and don't like it when something appears to be getting the best of me and I finally mastered the technique. Well, maybe not mastered it. I still sometimes get confused with which piece of yarn I supposed to be knitting with but I've become more competent in this technique.
I'm planning to start on some more fingerless gloves soon, since horrors of horrors winter will be back far too soon. I've included some photos of some examples I have in my Wyvern Designs on Art Fire shop.
Purple Fingerless Gloves
Fun and Funky Kaleidoscope Mittens
Hope you enjoyed reading about my adventure.
I first came across this method of knitting from a craft book club to which I belong. I was looking through the book catalog before throwing it in the recycling bucket and a book called Knitting Circles Around Mittens and More by Antje Gillingham caught my eye.
I've knitted for years, having learned from my mother as a child, but my projects were mostly flat items, afghans, scarves and the like. The few times I attempted to knit mittens, they always came out way too big and were always different lengths and they had to be seamed up the side, since I could never get the hang of knitting with double pointed needles. The same was true for any hats I made. With this technique, the mittens or gloves come out the same length and size, since you work them both at the same time.
Knitting with two circular needles takes some getting used to. The book said to get two different length circular needles so that you can keep track of which needle you started on but I found that knitting with one 16" needle and one 24" needle didn't feel comfortable. I solved that problem by using two of the longer needles and placing a stitch marker at the beginning of the starting needle.
In this method you cast on your stitches onto one of the needles and split them between the two needles, making sure that the stitches don't get twisted in the process. I can't tell you how many times I had to start over because I hadn't realized that I had somehow gotten the stitches twisted. Once you have done this process for both mittens on the same two needles, you start to knit. At first this method can be quite confusing, at least I found it so. You have two needles, two balls of yarn, and two dangling bits from casting on your stitches. I had to start over a number of times because I either started knitting with the wrong ball of yarn or with the left over from casting on. As I stated in my first post about this method, it was like knitting with an uncooperative octopus and there were lots of expletives uttered and many times I got so frustrated that I threw the whole thing against the nearest wall.
But I am quite stubborn and don't like it when something appears to be getting the best of me and I finally mastered the technique. Well, maybe not mastered it. I still sometimes get confused with which piece of yarn I supposed to be knitting with but I've become more competent in this technique.
I'm planning to start on some more fingerless gloves soon, since horrors of horrors winter will be back far too soon. I've included some photos of some examples I have in my Wyvern Designs on Art Fire shop.
Purple Fingerless Gloves
Friday, January 31, 2014
Adventures In Knitting - Part 3
In my past two posts. I discussed learning to knit in the round using two circular needles and knitting a piece in double knitting. This week's theme is Intarsia.
Intarsia is also called color block knitting. It differs from Fair Isle, which I've never done but is next on my list, in that you do not carry the yarn behind the piece as you knit. In intarsia knitting, you drop one color yarn and pick up a new color, making sure that you wrap the old color with the new to help lock it in place.
I chose a simple skull to start with. How hard could it be simply using black and white yarn in this piece. Boy, was I wrong! I started out by casting on the required number of stitches with the black yarn. As I wanted a piece that I could show a customer, I wanted the skull framed by a black square. I used the skull pattern I had graphed out for my double knitting piece with a few modifications. I had prepared small amounts of yarn wrapped around pieces of recycled cardboard. I had one white and one black. It wasn't until I actually started knitting the skull that I knew I had underestimated how many small balls of yarn I needed. If I thought this project was going to be simple, I was sadly mistaken!
It turned out that for this simple skull, I needed 4 balls of white yarn and 4 balls of black. I stated in my first post that learning to knit in the round using the two circular needle method was like knitting with an octopus, my first experience with intarsia was like trying to knit with an octopus which was fighting with a squid!
The instructions I was following stated that you simply leave all the tails of the yarn hanging behind your piece and weave them in when your through. So I not only had the 8 balls of yarn dangling behind my work, I also had at least 7 tail ends to get in the way!
I can't count the number of times I grabbed one of those tail ends and started knitting with it or I grabbed the wrong ball of yarn to knit with. Often, by the time I realized what I had done, I was either halfway across the row or on the next row. Now, if you read my other Adventures, you know what my response was. If you haven't read them, I can tell you there were a few choice expletives and many throwings of the piece against the nearest wall. Then , when I felt better, I would unpick all the stitches and continue on. I finally finished the piece:
I didn't take a photo of the back because I hadn't woven all the yarn pieces yet and it was a total mess. Considering the frustration I sometimes felt while knitting this piece, I think it came out pretty well. Currently, I'm making a pair of boot toppers featuring this same pattern and I have learned my lesson. I wove all the yarn tails in as I went along and I was careful about which strand of yarn I picked up next to knit with. I'm happy to say that is current experience in Intarsia is much better than my first!
Intarsia is also called color block knitting. It differs from Fair Isle, which I've never done but is next on my list, in that you do not carry the yarn behind the piece as you knit. In intarsia knitting, you drop one color yarn and pick up a new color, making sure that you wrap the old color with the new to help lock it in place.
I chose a simple skull to start with. How hard could it be simply using black and white yarn in this piece. Boy, was I wrong! I started out by casting on the required number of stitches with the black yarn. As I wanted a piece that I could show a customer, I wanted the skull framed by a black square. I used the skull pattern I had graphed out for my double knitting piece with a few modifications. I had prepared small amounts of yarn wrapped around pieces of recycled cardboard. I had one white and one black. It wasn't until I actually started knitting the skull that I knew I had underestimated how many small balls of yarn I needed. If I thought this project was going to be simple, I was sadly mistaken!
It turned out that for this simple skull, I needed 4 balls of white yarn and 4 balls of black. I stated in my first post that learning to knit in the round using the two circular needle method was like knitting with an octopus, my first experience with intarsia was like trying to knit with an octopus which was fighting with a squid!
The instructions I was following stated that you simply leave all the tails of the yarn hanging behind your piece and weave them in when your through. So I not only had the 8 balls of yarn dangling behind my work, I also had at least 7 tail ends to get in the way!
I can't count the number of times I grabbed one of those tail ends and started knitting with it or I grabbed the wrong ball of yarn to knit with. Often, by the time I realized what I had done, I was either halfway across the row or on the next row. Now, if you read my other Adventures, you know what my response was. If you haven't read them, I can tell you there were a few choice expletives and many throwings of the piece against the nearest wall. Then , when I felt better, I would unpick all the stitches and continue on. I finally finished the piece:
I didn't take a photo of the back because I hadn't woven all the yarn pieces yet and it was a total mess. Considering the frustration I sometimes felt while knitting this piece, I think it came out pretty well. Currently, I'm making a pair of boot toppers featuring this same pattern and I have learned my lesson. I wove all the yarn tails in as I went along and I was careful about which strand of yarn I picked up next to knit with. I'm happy to say that is current experience in Intarsia is much better than my first!
Friday, January 24, 2014
Adventures In Knitting - Part 2
Last week, I described my adventures in learning how to knit in the round with two circular needles. This week, it's time to describe my adventures in learning how to double knit and knitting an intarsia piece.
First let me say, that these particular experiments were at the request of a customer who bought a bracelet from me on Wyvern Designs on Art Fire and said, "Oh by the way, I see that you knit. Could you knit a scarf with a hood that lays flat under my coat? And has skulls on it?" I said, sure I'm game and went off to try and teach myself how to do this!
I have never knitted using either of these methods but I figured how hard could it be? So off to the internet to see what kind of instructions were out there. I found many different videos and written tutorials. After watching lots and lots of them I sat down and graphed out a skull pattern. I started with double knitting. I searched for some scrap yarn with which to create my masterpiece, grabbed some needles and started to cast on.
Now, there are several different ways to do this. One tutorial instructed to cast on with both yarns at once, making sure that the two colors lay in the correct alignment. I cast on using some hideous turquoise blue and bright yellow yarn I had. I figured I was never going to use either for anything else so why not use it in this piece. Half my double stitches came out Turquoise-yellow and the other half, yellow-turquoise. So I ripped that out and tried the other method which entails casting on with one color and then knitting the second color as you go along in the first row. This proved to be so difficult that I threw the piece at the wall, which if you read my last adventure, you'll realize is my method of relieving stress. After I picked the piece up and untangled the yarn, I ripped all those stitches out.
After several more tries using both methods, I decided to invent my own method. I cast on the stitches using both yarns at once and went back and positioned the stitches by hand so that they were in the right order.
I started to knit. With double knitting, you follow a chart, knitting with the appropriate color yarn to make your "picture". The piece is extra thick and double sided, hence the term double knitting. In my case, one side had a turquoise background with a yellow skull and the other a yellow background with a turquoise skull. But I soon realized that I can't even read my own chart and I had messed up several times. So I ripped out that piece and started again.
I decided that since I, apparently, couldn't read a chart, I would have to have written instruction for my pattern. I spent some time counting out how many turquoise and yellow stitches in each row and finally sat down to knit.
This time there was no more flinging things against the wall and things progressed nicely. I kind of like double knitting. You have to be mindful to knit the main color stitch of the side you're working on and purl the stitch for the other side. And as long as you follow the pattern, it turns out really well. I only did a swatch but I think it would make a nice warm scarf which is double sided and whose edges are sealed.
Here is my first attempt at double knitting. Don't mind the bilious colors. My daughter said it looks like something out of the seventies, which is probably when I bought the yarn.
I had intended to tell of my adventures
in Intarsia in this post, as well. but it ran a little long and I think I'll leave it for My
Adventures in Knitting-Part 3.
First let me say, that these particular experiments were at the request of a customer who bought a bracelet from me on Wyvern Designs on Art Fire and said, "Oh by the way, I see that you knit. Could you knit a scarf with a hood that lays flat under my coat? And has skulls on it?" I said, sure I'm game and went off to try and teach myself how to do this!
I have never knitted using either of these methods but I figured how hard could it be? So off to the internet to see what kind of instructions were out there. I found many different videos and written tutorials. After watching lots and lots of them I sat down and graphed out a skull pattern. I started with double knitting. I searched for some scrap yarn with which to create my masterpiece, grabbed some needles and started to cast on.
Now, there are several different ways to do this. One tutorial instructed to cast on with both yarns at once, making sure that the two colors lay in the correct alignment. I cast on using some hideous turquoise blue and bright yellow yarn I had. I figured I was never going to use either for anything else so why not use it in this piece. Half my double stitches came out Turquoise-yellow and the other half, yellow-turquoise. So I ripped that out and tried the other method which entails casting on with one color and then knitting the second color as you go along in the first row. This proved to be so difficult that I threw the piece at the wall, which if you read my last adventure, you'll realize is my method of relieving stress. After I picked the piece up and untangled the yarn, I ripped all those stitches out.
After several more tries using both methods, I decided to invent my own method. I cast on the stitches using both yarns at once and went back and positioned the stitches by hand so that they were in the right order.
I started to knit. With double knitting, you follow a chart, knitting with the appropriate color yarn to make your "picture". The piece is extra thick and double sided, hence the term double knitting. In my case, one side had a turquoise background with a yellow skull and the other a yellow background with a turquoise skull. But I soon realized that I can't even read my own chart and I had messed up several times. So I ripped out that piece and started again.
I decided that since I, apparently, couldn't read a chart, I would have to have written instruction for my pattern. I spent some time counting out how many turquoise and yellow stitches in each row and finally sat down to knit.
This time there was no more flinging things against the wall and things progressed nicely. I kind of like double knitting. You have to be mindful to knit the main color stitch of the side you're working on and purl the stitch for the other side. And as long as you follow the pattern, it turns out really well. I only did a swatch but I think it would make a nice warm scarf which is double sided and whose edges are sealed.
Here is my first attempt at double knitting. Don't mind the bilious colors. My daughter said it looks like something out of the seventies, which is probably when I bought the yarn.
I had intended to tell of my adventures
in Intarsia in this post, as well. but it ran a little long and I think I'll leave it for My
Adventures in Knitting-Part 3.
Monday, January 13, 2014
My Adventures In Knitting Part 1
I've known how to knit since I was a child, which is more years than I care to mention. Mostly I've knitted scarves and afghans. Not very challenging stuff! But a while ago I came across a book about knitting mittens and fingerless gloves in the round, using two circular needles. I thought it looked interesting and the fact that both mittens would be done at the same time and be exactly the same size was an added plus.
So, I went out and bought some circular needles. The book recommended buying one 16" and one 24" of the size needle required to obtain the correct gauge. The different sizes were so that you could differentiate between the back and palm sides of the mittens. I found the different sizes difficult to work with and out I went to the store to get another 24" needle. That seems to work better for me. To tell which is the back, as opposed to the palm side, I simple put a stitch marker in place on the back side of the mitten.
I cast on my stitches and after several frustrating attempts, got the stitches set up the correct way without any twisting. Now I had two circular needles, four needle tips, two skeins of yarn, two strands of yarn to knit with and two tails left from casting on. I started to knit. It was like knitting with an octopus. Several times in the first few rows, I had to undo stitches because I had started knitting with the left-over tails of my cast-on row. I had to start over several times because I got confused on which needle I was supposed to use. I admit that I threw the whole thing at the wall a few times and uttered some loud expletives quite a few times. But I finally got the hang of it.
I've knit a number of pairs of mittens and fingerless gloves using this technique. I highly recommend it because of the fact that there are no seams, the mittens come out exactly the same size and they are both finished at the same time. Add to that, the fact that I've tried knitting with double pointed needle and could never get the hang of it.
Here is one of the items I've knitted using the two circular needle method:
Lacy Ribbed Long Cuffed Mittens
The next technique I taught myself was continental knitting. I've always been a thrower when it came to knitting, holding the working yarn in my right hand and "throwing" it around the needle to knit or purl. I came upon a video on YouTube demonstrating the Continental or "Picking" method and decided to see if I could master this technique. It was very awkward and difficult to get used to holding the yarn in my left hand and scooping it up with the needle. I thought that I had finally mastered it, sort of.
My knitting stitches were fine but my purl stitches were very tight and seemed to be backwards on the needle, so back I went to the internet looking for more instructions. I found a new video and sat down at my computer and started to knit. I had to rewind a lot until I finally got the hang of it. Continental knitting is quicker and easier on your hands that the "throwing" version. Once you master it, you'll wonder why you ever knitted any other way. Now, I knit everything using the Continental knitting method.
This pair of Half Fingered Gloves with Hoodie was knit using the Continental method of knitting.
I have several other adventures in knitting but I think I'll save those for another post. They involve Intarsia and Double Knitting and they posed a whole other set of challenges.
So, I went out and bought some circular needles. The book recommended buying one 16" and one 24" of the size needle required to obtain the correct gauge. The different sizes were so that you could differentiate between the back and palm sides of the mittens. I found the different sizes difficult to work with and out I went to the store to get another 24" needle. That seems to work better for me. To tell which is the back, as opposed to the palm side, I simple put a stitch marker in place on the back side of the mitten.
I cast on my stitches and after several frustrating attempts, got the stitches set up the correct way without any twisting. Now I had two circular needles, four needle tips, two skeins of yarn, two strands of yarn to knit with and two tails left from casting on. I started to knit. It was like knitting with an octopus. Several times in the first few rows, I had to undo stitches because I had started knitting with the left-over tails of my cast-on row. I had to start over several times because I got confused on which needle I was supposed to use. I admit that I threw the whole thing at the wall a few times and uttered some loud expletives quite a few times. But I finally got the hang of it.
I've knit a number of pairs of mittens and fingerless gloves using this technique. I highly recommend it because of the fact that there are no seams, the mittens come out exactly the same size and they are both finished at the same time. Add to that, the fact that I've tried knitting with double pointed needle and could never get the hang of it.
Here is one of the items I've knitted using the two circular needle method:
Lacy Ribbed Long Cuffed Mittens
The next technique I taught myself was continental knitting. I've always been a thrower when it came to knitting, holding the working yarn in my right hand and "throwing" it around the needle to knit or purl. I came upon a video on YouTube demonstrating the Continental or "Picking" method and decided to see if I could master this technique. It was very awkward and difficult to get used to holding the yarn in my left hand and scooping it up with the needle. I thought that I had finally mastered it, sort of.
My knitting stitches were fine but my purl stitches were very tight and seemed to be backwards on the needle, so back I went to the internet looking for more instructions. I found a new video and sat down at my computer and started to knit. I had to rewind a lot until I finally got the hang of it. Continental knitting is quicker and easier on your hands that the "throwing" version. Once you master it, you'll wonder why you ever knitted any other way. Now, I knit everything using the Continental knitting method.
This pair of Half Fingered Gloves with Hoodie was knit using the Continental method of knitting.
I have several other adventures in knitting but I think I'll save those for another post. They involve Intarsia and Double Knitting and they posed a whole other set of challenges.
Sunday, November 3, 2013
Subscribe to:
Posts (Atom)