Tuesday, March 17, 2015

Painting With Wool

Or in my case finger painting with wool!

I admit that I'm a novice when it comes to felting wool.  But the process fascinates me.  I haven't, so far, ventured into wet felting, although I'm seriously considering it.  No, what I do is needle felting.

Wet felting involves applying warm soapy water to layers of fibers that are laid at 90 degrees angles to one another.  Then, through repeated agitation and compression, the wool fibers "hook" together to form one cohesive piece of fabric. 

Wool felts because the fibers are covered with tiny scales, similar to those on a human hair.  When wet, these scales expand and the agitation allows them to hook onto each other, creating a felted piece of material.  Plant and synthetic fibers will not felt. 

Needle felting is much less involved.  Since wool naturally wants to stick to itself when agitated, the use of a felting needle facilitates the process. A felting needle has notches along the sides of the needle near the point that "grabs" the wool fiber and tangles it together, forming a unified piece of fabric.

I've made bottle cap pincushions using this method.  They are tiny little things measuring a few inches in height.  I cheated a bit.  Basically because I'm cheap,I used an old sweater that I had previously felted for the core, needle felting it into a sphere.  Then I used the more expensive roving to cover the ball.

Purple and White Bottle Cap Pincushion

Hand Embroidered Miniature Bottle Cap Pincushion


But my latest project is a leaf shaped Amulet Pouch


I started this project with a piece of off- white 100% wool felt.  

 The next step was to needle felt over this base with various colors of wool roving.  I chose greens, yellow, orange, and purple to give the finished leaf an Autumn look.

I have two different felting needles.  The one on the left is a single needle, while the one on the right has multiple needles in a finger saving case.  I'll warn you right now, that you DO NOT want to needle felt while watching television.  I have the scars to prove that it's not a good thing!

Using a block of foam, I spread the base with small hanks of the roving and started the needle felting process.  Yes, it's tedious but it did give me time to think about what I was going to make for supper.  Chicken stir fry, if you're interested!


Finished piece of needle felted fabric

Needle Felted Piece With My Leaf Patterns


I cut out two of each size.  I never did use the smaller on.  Oh well, maybe another project.


For the amulet bag, I needle felted brown wool yarn for the veins of the leaf.  Using a piece of orange and purple wool roving, I needle felted a  spiral on the front and back,  stitched the two larger leaves together on my sewing machine, then needle felted the orange and purple roving along the front and back edges.  I added one of my hand made owl beads to the front and a length of recycled sari silk for the necklace.  The two large variegated beads are also some of my hand made polymer clay beads.

Wednesday, January 7, 2015

As The New Year Dawns.....

As the New Year dawns, my thoughts turn to the goals I've been neglecting lately.  I am currently in the midst of cleaning and organizing my studio, which has become a place of chaos and an exercise in frustration.  My studio has gotten so messy and cluttered that I can't find anything anymore.  I've spent the last several days trying to tidy it up so that I can find things.  It's not finished but I've found some things that I thought were lost forever!

Another goal I have is to devote more time to creating and less time procrastinating.  I have all these ideas floating around in my head but ever time I think I should  forget everything else and just go create, something sidetracks me and I never start.  I've gotten a good start.  I'm creating a line of doggy floor cloths, sort of like a place mat for your dog.  I sold one, right before Christmas and the buyer was delighted and even sent me a picture of her dog using his new place mat! I have another one almost ready to go.  All it needs is a coat or two of Polyacrylic sealer and it's good to go.  These place mats take at least two weeks to cure before shipping to allow the paint and sealer to dry fully.

Custom Doggy Floor Cloth
  I've been busy applying gesso to canvas for more doggy floor cloths and a couple of kitty ones, as well!

I have a myriad of other goals for this new year.  One that I hope to attain soon is to get my website up and running but for now I'll settle for the small ones and strive to work to achieve the larger ones.

Thursday, December 4, 2014

Here comes Christmas!

Christmas is comeing up fast and I've been working furiously to get everything I've made lately listed in my Art Fire shop.  Here are a few of the items I've recently listed.

Millefiore Key Chain


Pickle Ornament
Snowman Ornament

Merry Snowman Ornament
Some new Buttons
Kaleidoscope Earrings

And some round Dangle Earrings 

I hope everyone has a very happy Holiday Season!
 

Tuesday, November 11, 2014

If I only Had Time...

There are many things I'd love to learn to do.  Sky dive, scuba dive,  drive a race car.  But those are pipe dreams.  There are a few more that are a bit more realistic. 

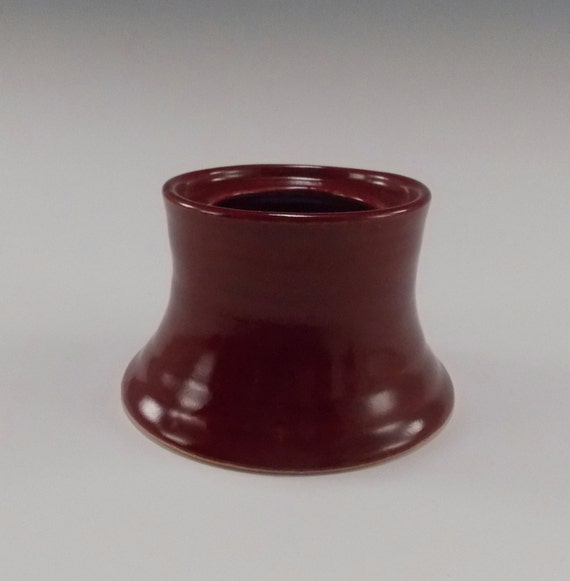
I've always wanted to learn how to throw a clay pot.  Martina of Pottery Heaven on Etsy has this skill down to a science.  She make wonderful mugs, unity sets, and pendants, using her skill as a potter.  I have worked with clay only once and that was in high school.  I had a large bowl using the coil method but throwing a pot on a wheel is a dream I have.  Unfortunately, I don't have the time to learn, right now so I can only admire those who have the time and skill to do this wonderful work.

This Pillar Candle Holder is an example of her work.


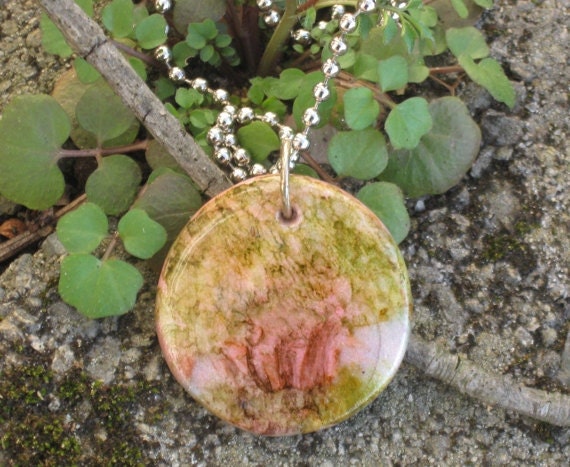
Another thing I'd love to try is using alcohol inks to paint on polymer clay.  Valerie from Valeris's Stuff on Etsy does some beautiful work using this technique.  I work with polymer clay but have never tried this technique.  Her pieces are gorgeous and I'm going to have to try this out for myself, but for now I will just have to admire her wonderful pieces.

I particularly like this piece called A Stand of Trees Pendant .  I can definitely see the trees in the swirl of color.
Some day I will get around to doing all the things I'd love to learn but for now I will just admire the work of those who have mastered them and enjoy their beautiful work.


Tuesday, November 4, 2014

Apple Crosata: The Lazy Woman's or Man's Apple Pie

Christmas and Thanksgiving are time for holiday dinners and parties.  Nothing is more satisfying than sharing a meal with those who are near and dear to your heart, be they family or friends.  I married into a big Italian family whose idea of a small get together consists of enough food to feed a small nation.  Though she's gone now, my mother-in-law was a wonderful cook and always did the Feast  of the 7 Fishes, an  Italian Christmas Eve tradition.  Although when I asked what I could bring, she always said, just yourself and your appetite, I felt awkward if I didn't arrive with something.  I came upon this recipe for an Apple Crosata which I would make and bring to her every Christmas Eve.  It tastes wonderful and is surprisingly easy.

I hope you enjoy it as much as we always have.

Apple Crosata

Crust1 1/2 C flour
1 1/2 T sugar
1/2 tsp salt
10 T chilled butter cubed
3 T ice water

For crust:
In food processor, mix flour, sugar and salt in a bowl.  Add chilled butter.  Pulse until the mixture resembles course cornmeal.  Add 3 T water all at once, pulsing and blending until moist clumps form, adding more water is dough is dry.  Gather dough into a ball, flatten into a disk shape and wrap tightly in plastic wrap.  Chill dough for at least one hour or overnight.

For filling:
Approximately 5 medium apples, peeled and cored, 3T sugar, cinnamon, 2 tsp lemon juice, 2T butter, 

Filling:  Peel, core and slice approximately 5 medium sized apples.  (Pick your favorite.  I use whatever type is on sale.)  In a large bowl combine apples, 3T sugar, cinnamon to taste, 2 tsp lemon juice and gently toss to coat.
 
Roll out dough between two pieces of 18" parchment paper to a 14" round circle.  Arrange 3/4 of the apples in the center of the dough, mounding slightly.  Leave a border of at least 4" of dough around the mound of apples.  Overlap the remaining apple slice in a concentric circle atop the mounded apples.   Sprinkle 1 T of sugar over apples and dot with the 2 T of butter, thinly sliced.   Fold plain edge of crust over the apples, leaving the apples exposed in the center.  Gently fold and pinch the dough edge to seal any cracks.   Brush crust with 2T milk and sprinkle remaining 1T sugar over  the crust.

Preheat oven to 425 degrees.  Bake until crust is golden brown.  About 40 minutes.

If you find any errors in context, please let me know.

Tuesday, October 21, 2014

Celebrate The Holidays!

This time of year is one of three major holidays, my favorite, Halloween, Thanksgiving, and Christmas.  If you're like me, you love to decorate for these festive times.  I found some unique and creative handmade items to do just that!

Halloween Flying Bats Metal Sign by Refined Inspirations
Candle Hat Ghost Candle Holders by Augusta Wynde
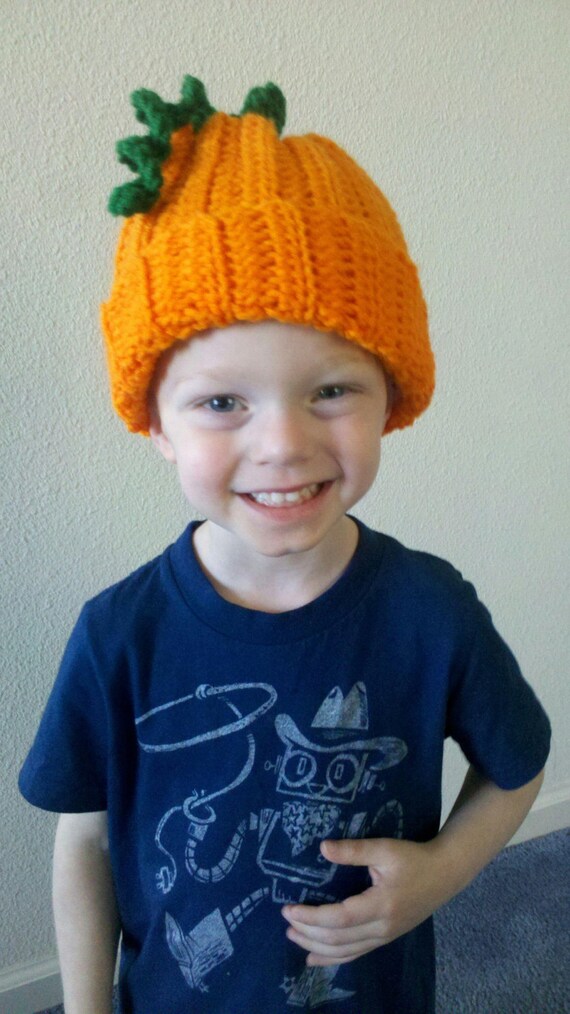
Pumpkin Hat by SolHeritage
 
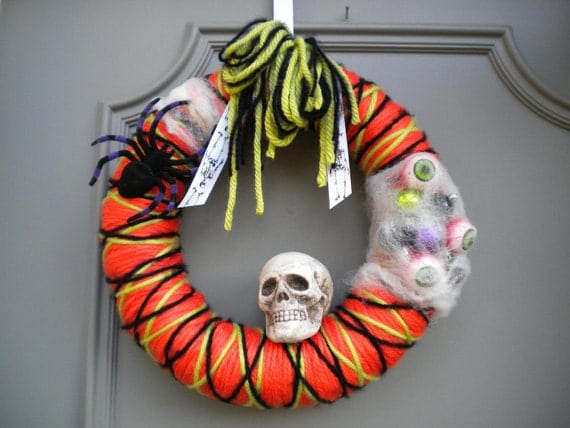
Spooktacular Halloween Yarn Wreath by SolHeritage

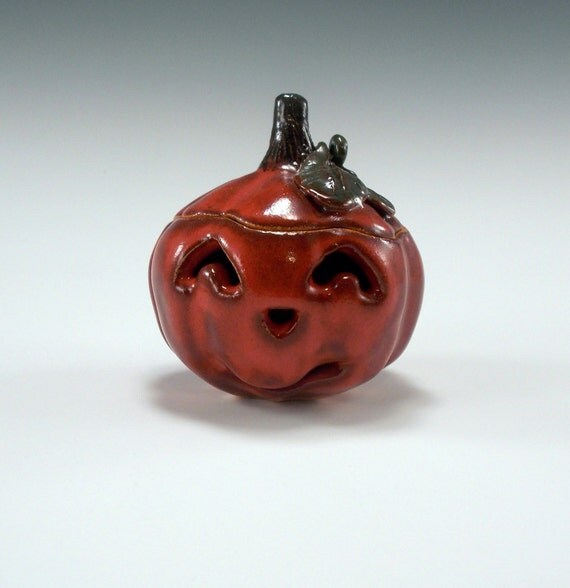
Small Ceramic Jack O Lantern by Pottery Heaven


Thanksgiving Candy Dish With Pumpkin Topper by MJoys


Red and Green Striped Christmas Stocking by Precious Knits


Snowman and Christmas Tree Lapel Pin by Wyvern Designs
                                                                                                                                               

Thursday, October 16, 2014

Countdown to Christmas 2014

 Julie and Blu from Blue Morning Expressions are again hosting the famous Countdown to Christmas on their blog.  I missed the first three weeks but finally got my act together and participated in week  4.  I encourage anyone who can, to visit and participate.

All that's required is that you have a shop somewhere on line.  You can post three of your items but you  Must promote all the items in the countdown, either through twitter, face book, pinterest, and/or wanelo or your blog.  Pinterset and Wanelo are recommended because everything is displayed in one place.

It's a fun way to get to see what other artists are doing and to help each other out.


Countdown to Christmas Week 1
Countdown to Christmas Week 2
Countdown to Christmas Week3

Countdown to Christmas 2014 Week 4
Countdown to Christmas Week 5
Countdown to Christmas 2014 Week 6
Countdown to Christmas Week 7
Here's Countdown to Christmas Week 8
Blue Morning Expressions Countdown to Christmas Week 9
Countdown to Christmas 2014 Week 10
Countdown To Christmas 2014 Week 11
Countdown to Christmas 2014 Week 12